The evolution of the technology has made the web super-fast. Gone are the days when people were patient enough to wait for a slow website to load entirely. They didn’t had many options then. In today’s time, with N number of options available on the Internet, waiting for a website to load entirely is the last thing a user prefers. If your website is slow, you can’t expect the user to wait for it to load. Instead, he will touch the back button immediately, and land on the website giving them the fast results.
How will it impact your website? When a visitor exits your website just after checking out a single page, or even before the website loads completely, it increases the bounce rate of your website. Now, what is the bounce rate? The bounce rate is the percentage of people leaving your website just after viewing the first page or before the website loads properly. The high bounce rate makes Google think of your website being too slow, irrelevant or spam. The higher the bounce rate, the more suspicious Google becomes. This forces the algorithm to degrade your rankings.
And, as a business-owner, the worst thing you can see is the degradation of your website ranking which eventually resembles a degradation of your online presence. So, what is the solution to it? You need to increase your website speed and provide the user with a much better interface and a reason to stay. Here are some tips from Pat’s Marketing, SEO Agency Toronto, to help you improve your website speed.
Tools to Check a Website Speed
But, how do I know if my website is slow? Is it just loading time? No, there are numerous factors to be taken into consideration when it comes to website speed. We list the best free website speed testing tools below. Read them out and decide which tool meets your requirement.
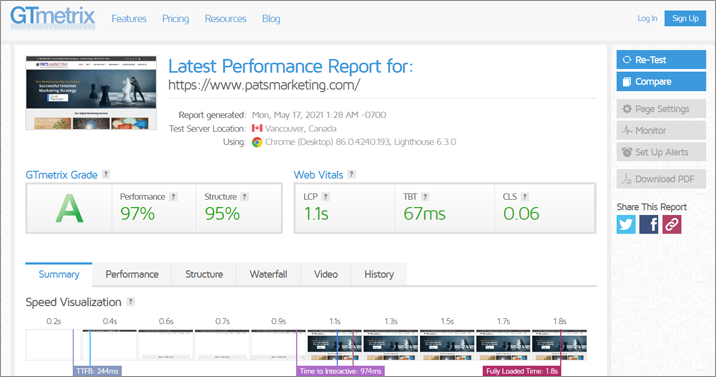
1. GTMetrix: The GTMetrix tool comes with a simple user-interface and thus it is easy for you to understand and use the same. Just put the URL in the box and click Analyze. You will be shown a comparison of the reaction time of your website and other websites.

Also, the scores are broken down according to the class and type. It will make you understand clearly where the issue persists and how you can solve the same.
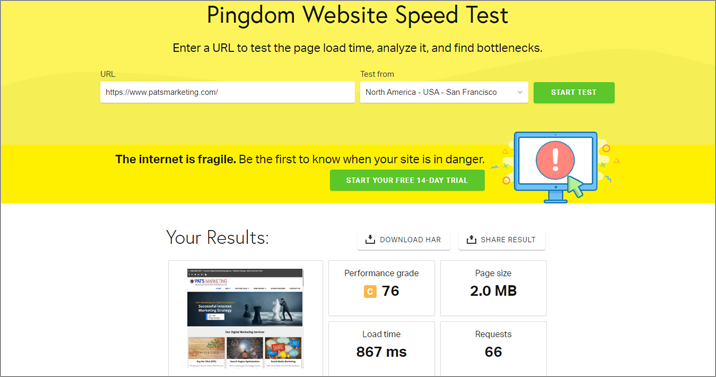
2. Pingdom: Like, GTMetrix, Pingdom also comes with an amazingly easy to understand interface. You can test the website speed for four different testing locations. You can select the geographical location according to your user base.

The data results Pingdom gives are easy enough to skim and interesting enough to dive in. The specific information regarding troubleshooting of the issues is also provided.
3. WebPageTest: Slightly advanced, WebPageTest allows the user to choose between the browser and geographical location of your audience base. This tool runs the test 3 times on a website and thus ensures a deep analysis. You can check the full report of these tests and figure out the issues troubling your website’s speed.
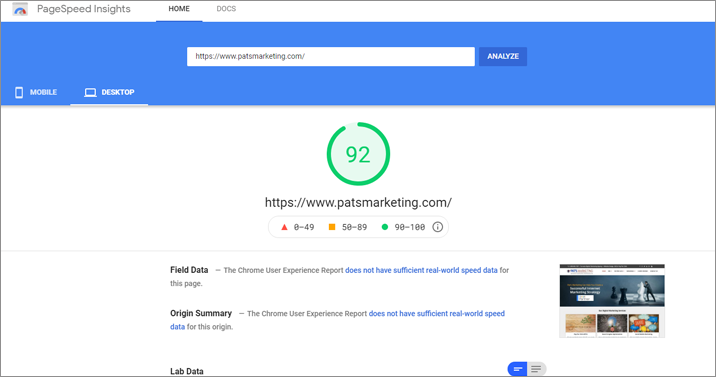
4. Google PageSpeed Insights: This tool is created by Google itself. It gives an overall report of the website user for both, desktop and mobile. If you are a beginner, you might face some difficulty in using this tool as you need to compare the reports generated by yourself to figure out the issue. Google PageSpeed Insights tool is mostly used by the pros and the website developers.

5. Uptrends: This is another free website speed test tool. Uptrends users can select the geographical region, select the browser, and compare the mobile and desktop results.Results are simple to analyze and understand even for the beginners and non-developers.
Tips to Optimize the Website
The tips to optimize your website and thus increase the website speed to improve your Google rankings are as follows.
1. Image Optimization: Images are a vital part of the website’s success. But, often they are a major contributor to slow loading of websites. Thus, the compression of images should be an important part of your website design. This ensures a faster site loading time.
You can directly crop images to use the right size of image or use various tools available on the Internet to compress the images. If you are using WordPress to create a site, you can use WP Smush plugin to compress your image. Also, you can use the following online tools to compress the images:
2. Delay JavaScript Loading: Try delaying the loading of JavaScript until other elements of your site are entirely loaded. If you are designing your website on WordPress, install and activate the WP Rocket Plugin. This plugin allows you to delay the JavaScript loading with ease. Just check the box reading “Defer JavaScript Loading” to delay the loading of JavaScript. Once you do it, test the website speed again.
3. Managing HTTP Requests: Most of the website’s load time is spent in downloading the parts of the pages like images, CSS, JavaScripts, etc.
Here, you need to figure out what is required for your website and minimize the same by eliminating the unnecessary parts.
Google Chrome provides you a browser’s Developer tool to check how many HTTP requests your site makes and thus work on the same. The less the number of tools, the less is downloading time and less is the website loading time.
4. WordPress Cache Plugin: The pages that you use in your website requires a process to be displayed to the user. When multiple visitors land on your website, the process becomes complex, and ultimately slows down your website. Thus, installing and activating the WordPress Cache Plugin is highly recommended.
This plugin prevents the repetition of the process every time and makes a page copy after the first load and the cached version is displayed to every user visiting further.
As the repetition of process on every visit is eliminated, the website loading speed increases to a great extent.
Some of the popular WordPress caching plugins are: WP Rocket, WP Total cache, WP Super cache, etc. Every hosting company has their own caching too which can be used for instance Siteground uses built-in caching called SG SuperCacher.
5. Web-Hosting: If you are a beginner, you will be inclined towards selecting the cheapest hosting service plan. There are three hosting options available: Shared Hosting, VPS Hosting, & Dedicated Server.
Most beginners prefer going with shared hosting as it is the cheapest option available. This hosting type is fine for low-traffic sites, but, a spike in traffic will make it difficult for your website to handle the load. Thus, we highly recommend to have a faster hosting.
In VPS hosting, you share a server, but you have dedicated resources. VPS Hosting can be a great option for anyone with intermediate traffic on his website.
If you don’t wish to share the server at all, Dedicated Hosting is for you. If you go with Dedicated Hosting, you are your own boss. You need not worry about the accommodation of heavy traffic at all. Dedicated Hosting is a bit expensive option, but it is worth to put bet on if you don’t wish to stay concerned about website speed due to heavy traffic.
6. Choosing a WordPress Theme: Agreed, you want your site to look attractive. But, some highly attractive themes come with a poor coding and thus making the theme responsible for slow website speed. Instead, you can go with a simpler theme accompanied with the proper optimization.
Remember, a simple theme can make your website look attractive too. It is all on you to use your creative mind in website designing. Most of these themes are free from any unnecessary features. All these features are already available in the form of WordPress Plugins, you don’t need any special themes for it.
7. Managing WordPress Database: After you use WordPress for a while, the database size may grow too big from WordPress storing the article revisions etc. To boost your website’s performance, you can optimize your database to make sure you filter out all the unnecessary information.
You can use WP-Sweep Plugin to clean your WordPress database. This plugin allows you to clean your database by deleting unnecessary things like trashed posts, unused tags, page revisions, etc. Thus, optimizing WordPress Database is now simple for you.
8. Time to First Byte: Time to First Byte is the amount of time a browser needs to wait before getting the first byte of information from the server. According to the Google’s guidelines, TTFB of a site must be less than 200 ms.
You can use numerous third-party tools to access the information regarding your TTFB. If you find your TTFB less than 200 ms, your website is doing well. If not, then check out what are the unnecessary things working as a hindrance for the TTFB of your website.
9. Using CDN: Content Delivery Network (CDN) minimizes the delay in website loading speeds by reducing the distance between the server and the user. Absence of CDN forces the server to respond to every user end request. It increases the chances of origin failure which eventually leads to website load time failure.
CDN stores a cached version of the website content in geographical locations all over the world which are termed as “Point of Presence”. CDN is one of the easiest ways of increasing the website’s speed along with lowering the latency period.
10. Use External Hosting: Along with hosting your files on your CDN, you can use an external hosting source to host videos or other larger files of your site.
For video hosting, use websites like YouTube, Vimeo etc. and embed the video link on your website instead of hosting the video on your web hosting platform. This will significantly speed up your website.
Just check out these 10 pointers and to ensure your website will not lack because of poor website loading speed anymore. Looking for fast wordpress website designs or an effective website SEO program? Reach out to Pat’s Marketing, Toronto SEO Consultant, at 1-888-488-7287. We are keen to collaborate with you and take your online presence to a whole new level.


